An electronic signature attached to an email message is a form of secure online communication. It allows you to verify who the real sender of the message is and whether the content of the message has been changed during transmission. If you already have your electronic signature, just upload it to your email client and start adding it to your messages. Not sure how to do it? In this article, we'll explain how to secure messages using a digital signature for MS Outlook users.
To set up a digital signature in your email client, you must have a valid Qualified certificate. This should be installed in the Windows OS including the private key. It is this prerequisite that differentiates an electronic signature from your regular email signature (business card) that you add to e-mail messages. While a signature representing a final greeting can be imitated by anyone, a signed message can only come from the owner of the electronic signature.
You can also use certificates to encrypt your emails, further increasing the security of your communications and the data in your emails. This is what a public certificate is for. You can use the same procedure below to set up a commercial certificate.
Don't have one of these certificates? Learn the differences between each type and choose which one is better for your purposes.
The actual procedure is simple:
- In Outlook – select the File tab.

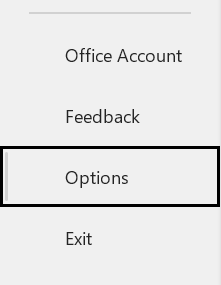
- Then select the Options tab.

- Next, the Trust Center >> Trust Center Settings

- Next, Email Security >> Settings

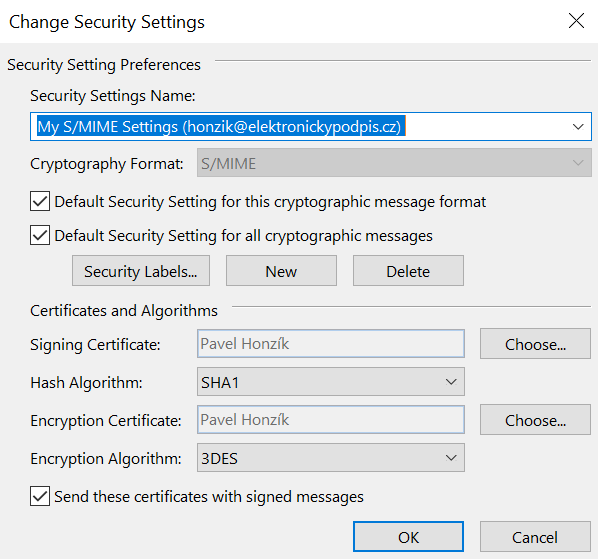
- Last step – Now is time to set up the certificates. To connect qualified certificate, select the first "Choose..." and for a commercial one, select the second "Choose"

- If it is a certificate stored on a USB token or eCertificate with a chip, you need to install the public part on your computer.
- The easiest way to do this is >> Click to view the certificate properties.
- Next, Install Certificate. On next steps you don't have to change anything so just press Next >> Next >> Finish
To actually insert the signature into the email, just select the Options tab in the email and press Sign. The email will then contain a small "seal" icon, indicating the certificate has been inserted.
If you don't already have a qualified certificate or public certificate for electronic signatures, please email us. We will be happy to set one up for you personally.
If you are not sure, please do not hesitate to contact us. Our team of professionals will be happy to provide you with a consultation and guide you through the entire process.
.png)